
 This guide covers easily installing Zabbix 3.0 on CentOS 7 with a MySQL database back-end. No fuzz, just the basics to get things up and running.
Recently Zabbix 3.0 was released and with it came a ton of great new features as well as an overhaul of the web UI front-end which was badly needed.
If you’re new to Zabbix, this is the version you want to pick for a first time installation. Zabbix 3.0 will be supported far into the future and is the new recommended release to install.
If you’re taking your first steps into the world of monitoring, installing Zabbix can seem a daunting task. In this guide however, I’ve tried to cut down on any unnecessary “fuzz”. This means you won’t necessarily get a detailed description of why every step was performed the way it was. On the plus side, the guide was intended to be very easy to follow. What you’ll end up with though, is still a fully functional Zabbix 3.0 Server with a MySQL database back-end.
Note that MySQL has been replaced with MariaDB, a fork of MySQL. Excerpt from Wikipedia:
MariaDB is a community-developed fork of the MySQL relational database management system intended to remain free under the GNU GPL. It is notable for being led by the original developers of MySQL, who forked it due to concerns over its acquisition by Oracle. Contributors are required to share their copyright with the MariaDB Foundation.
This guide is entirely written for CentOS 7. Currently, installing Zabbix 3.0 cannot easily be done on CentOS 6 using the Zabbix repositories. The Zabbix team is working on getting Zabbix 3.0 packages ready for CentOS 6.
Add the official Zabbix 3.0 CentOS 7 repositories
# rpm -ivh http://repo.zabbix.com/zabbix/3.0/rhel/7/x86_64/zabbix-release-3.0-1.el7.noarch.rpm
Disable SELinux
SELinux is a Linux kernel security module that is part of standard CentOS installations. The following should only be done in a test environment, as you would normally want to have SELinux properly configured. This guide won’t cover correctly setting up SELinux for your Zabbix Server, so for now, we’re going to disable it. :
# setenforce 0
# sed -i 's/^SELINUX=.*/SELINUX=disabled/g' /etc/selinux/config
Installing Zabbix 3.0 Server, agent and web front-end
# yum -y install zabbix-server-mysql zabbix-web-mysql zabbix-agent
Install MariaDB Server, enable and start it
# yum -y install mariadb-server mariadb
# systemctl enable mariadb.service
# systemctl start mariadb.service
Secure your MariaDB installation
# mysql_secure_installation
The script will ask you if you wish to change the root password of your MariaDB server. Answer ‘No’ for now, since this can be changed later. Answer ‘Yes’ to the remaining 4 questions. This will perform some basic hardening of your MariaDB server.
Create your Zabbix database and user
This will create your Zabbix database and a user called ‘zabbix’ with the <password> you specify. This user will be the one used by your Zabbix server and web front-end.
# mysql -uroot -p
MariaDB> create database zabbix character set utf8 collate utf8_bin;
MariaDB> grant all privileges on zabbix.* to zabbix@localhost identified by '<password>';
MariaDB> quit;
Import initial schema and data
Zabbix needs to setup your ‘zabbix’ database correctly and also create tables for it to use.
# cd /usr/share/doc/zabbix-server-mysql-3.0.1
# zcat create.sql.gz | mysql -uroot zabbix
Configure Zabbix Server
# vi /etc/zabbix/zabbix_server.conf
Search for “DBPassword=”, remove the # at the start of the line and fill in the password you chose in step 6:
DBPassword=<password>
To save and exit, type:
:wq!<enter>
Specify the timezone of your web front-end
# vi /etc/httpd/conf.d/zabbix.conf
On line 19, remove the ‘#’ from the start of the line and change the value to your timezone. A list of supported PHP timezone can be found here. Example: Europe/Copenhagen
To save and exit, type:
:wq!<enter>
Enable and start your Zabbix Server, agent and HTTPD service
# systemctl enable zabbix-server
# systemctl enable zabbix-agent
# systemctl enable httpd
# systemctl start zabbix-server
# systemctl start zabbix-agent
# systemctl start httpd
Verify that you can access your web front-end by opening a browser and pointing it to:
http://<your-server-ip>/zabbix/
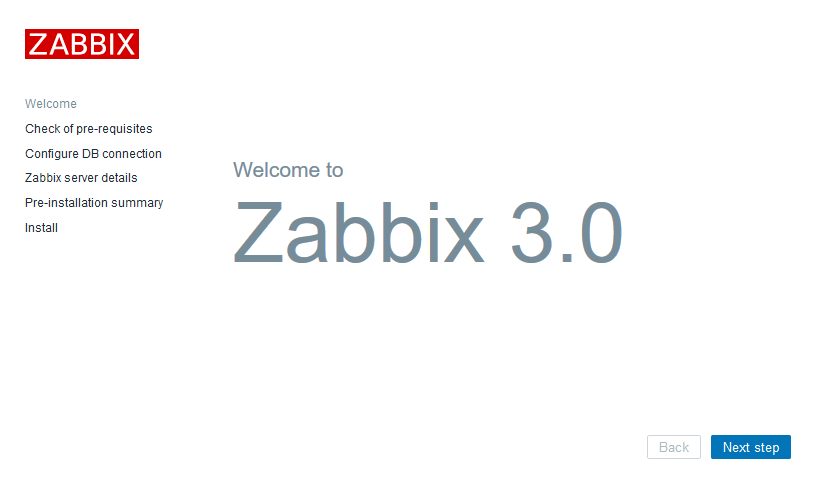
When you’ve successfully accessed your Zabbix web front-end, push ‘Next step’ to continue to pre-requisites check.
Front-end installation: Check of pre-requisites
If you’ve followed the steps outlined above, all values should return ‘OK’. Press ‘Next step’ to continue.
Front-end installation: Configure DB connection
Leave the default values. You only need to fill out the ‘password’ field with the <password> from step 6. Press ‘Next step’ to continue.
Front-end installation: Zabbix server details
Leave the default values. Optionally give your Zabbix server a name. Press ‘Next step’ to continue.
Front-end installation: Pre-installation summary
A summary of the settings you’ve chosen in the previous steps. Everything should be correct, so feel free to press ‘Next step’ to continue and perform the front-end installation.
You Zabbix Server and web front-end is now configured correctly. Press ‘Finish’ to be taken to the login page of your brand new Zabbix installation!
Congratulations! You have successfully installed your Zabbix Server and web front-end
The default super administrator login is: Admin / zabbix


for selinux there are booleans that are easy to set on centos 7
zabbix_can_network –> on
httpd_can_connect_zabbix –> on
httpd_can_network_connect_db –> on
probably you need to create a policy voor nmap with audit
Might in the future create a small guide for handling SELinux correctly for Zabbix Server, Proxy and Agent.
Thanks for the input!
HI team,
I am not able to start zabbix-server i am getting below error.
[root@localhost zabbix-server-mysql-3.0.3]# systemctl start zabbix-server
Job for zabbix-server.service failed because a fatal signal was delivered to the control process. See “systemctl status zabbix-server.service” and “journalctl – xe” for details.
Hi balaraju,
What output do you get if you run ‘systemctl status zabbix-server.service’?
HI martinmoerch
I think same above.
[root@localhost ~]# systemctl start zabbix-server.service
Job for zabbix-server.service failed because a fatal signal was delivered to the control process. See “systemctl status zabbix-server.service” and “journalctl -xe” for details.
Try with ‘status’ instead of ‘start’, that should give you more information:
‘systemctl status zabbix-server.service’
Hey, thank you for the tutorial. i’m a newbie in the world of Zabbix.
In fact, i get stuck in the 3th step :
When i run the cmd : yum -y install zabbix-server-mysql zabbix-web-mysql zabbix-
agent
==============================================================
–> Résolution des dépendances terminée
Erreur : Paquet : mysql-community-libs-5.6.31-2.el7.x86_64 (mysql56-community)
Requiert : libc.so.6(GLIBC_2.17)(64bit)
Erreur : Paquet : zabbix-server-mysql-3.0.4-1.el7.x86_64 (zabbix)
Requiert : libnetsnmp.so.31()(64bit)
Erreur : Paquet : zabbix-server-mysql-3.0.4-1.el7.x86_64 (zabbix)
Requiert : libc.so.6(GLIBC_2.17)(64bit)
Erreur : Paquet : zabbix-web-3.0.4-1.el7.noarch (zabbix)
Requiert : php >= 5.4
Disponible : php-5.3.3-47.el6.x86_64 (base)
php = 5.3.3-47.el6
Erreur : Paquet : iksemel-1.4-2.el7.centos.x86_64 (zabbix-non-supported)
Requiert : libgnutls.so.28()(64bit)
Erreur : Paquet : iksemel-1.4-2.el7.centos.x86_64 (zabbix-non-supported)
Requiert : libc.so.6(GLIBC_2.14)(64bit)
Erreur : Paquet : zabbix-agent-3.0.4-1.el7.x86_64 (zabbix)
Requiert : libc.so.6(GLIBC_2.17)(64bit)
Erreur : Paquet : zabbix-agent-3.0.4-1.el7.x86_64 (zabbix)
Requiert : libc.so.6(GLIBC_2.14)(64bit)
Erreur : Paquet : iksemel-1.4-2.el7.centos.x86_64 (zabbix-non-supported)
Requiert : libgnutls.so.28(GNUTLS_1_4)(64bit)
Erreur : Paquet : zabbix-server-mysql-3.0.4-1.el7.x86_64 (zabbix)
Requiert : systemd
Erreur : Paquet : zabbix-agent-3.0.4-1.el7.x86_64 (zabbix)
Requiert : libc.so.6(GLIBC_2.15)(64bit)
Erreur : Paquet : iksemel-1.4-2.el7.centos.x86_64 (zabbix-non-supported)
Requiert : libc.so.6(GLIBC_2.15)(64bit)
Erreur : Paquet : zabbix-agent-3.0.4-1.el7.x86_64 (zabbix)
Requiert : systemd
Erreur : Paquet : zabbix-server-mysql-3.0.4-1.el7.x86_64 (zabbix)
Requiert : libc.so.6(GLIBC_2.15)(64bit)
Erreur : Paquet : zabbix-server-mysql-3.0.4-1.el7.x86_64 (zabbix)
Requiert : libc.so.6(GLIBC_2.14)(64bit)
Erreur : Paquet : fping-3.10-1.el7.x86_64 (zabbix-non-supported)
Requiert : libc.so.6(GLIBC_2.15)(64bit)
That is due to the fact that you’re on a 32-bit system.
The Zabbix 3.0 RHEL 7 repository only has packages for x86_64 (64-bit) systems.
Thanks … Simple with U 🙂
Zabbix 3 running fine now on Centos 7
why i still have error in the time zone even i change it, still error in the installation process
Hello
I’m trying to install zabbix_agent on some machines that dont have access do internet. They are all CentOs 6. Whenever I try to do it, there are missing libraries .
Could you please tell me where to get them, so I cant install them before instaling the agent.
I believe you would have to retrieve all dependencies as RPM packages manually.
If you have the possibility I would suggest temporarily connecting the systems to the Internet and doing a one-time install. If not, it’s the manual way unfortunately.